display TESLA MODEL X 2017 Owner's Manual
[x] Cancel search | Manufacturer: TESLA, Model Year: 2017, Model line: MODEL X, Model: TESLA MODEL X 2017Pages: 198, PDF Size: 4.87 MB
Page 15 of 198
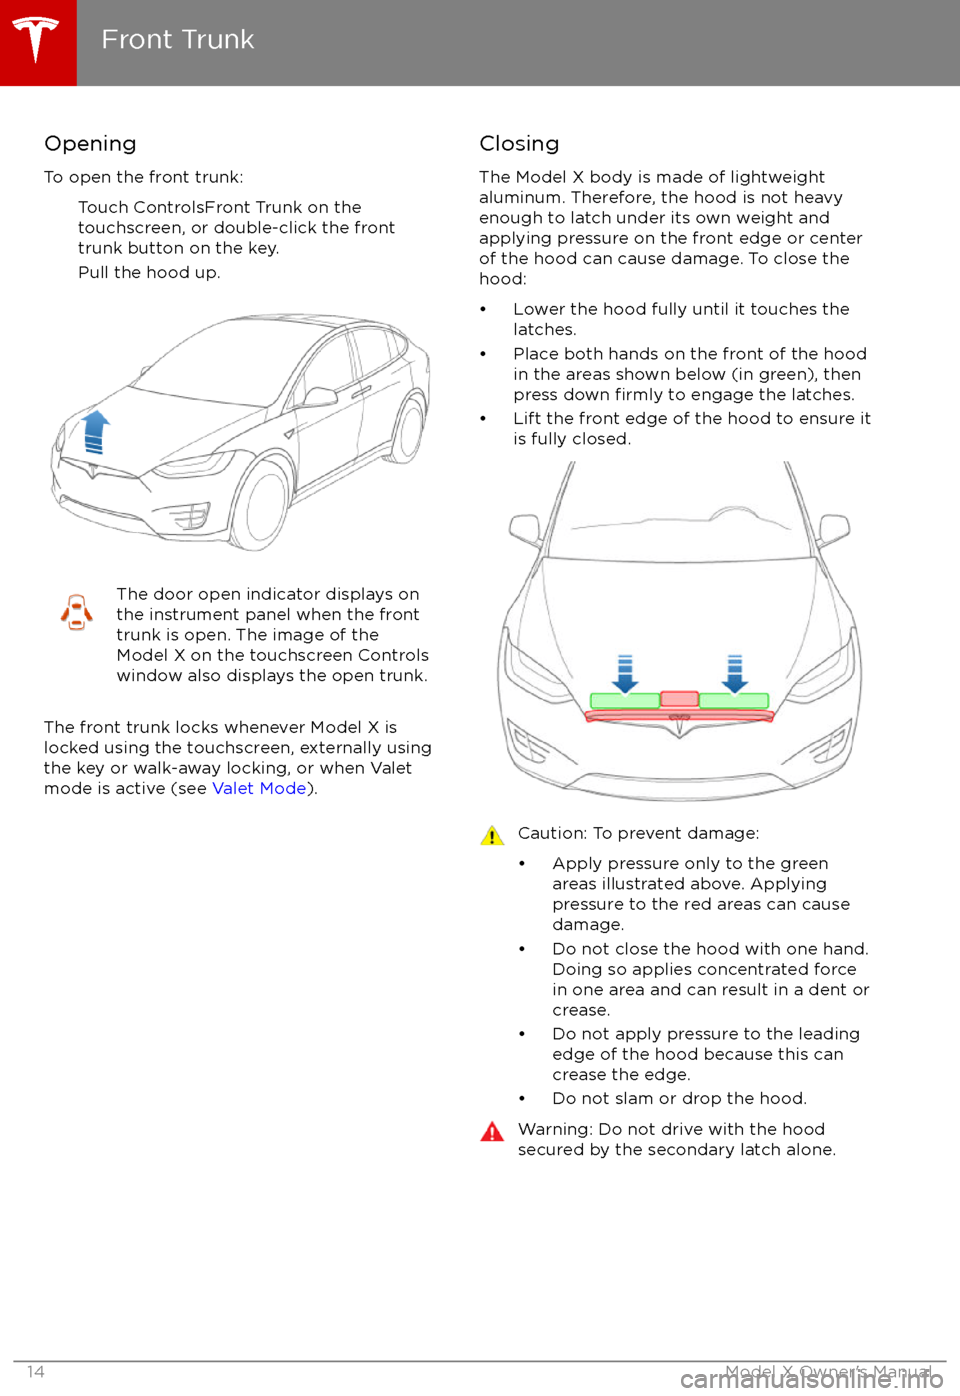
Opening
To open the front trunk: Touch ControlsFront Trunk on the
touchscreen, or double-click the front
trunk button on the key.
Pull the hood up.The door open indicator displays on
the instrument panel when the front
trunk is open. The image of the
Model X on the touchscreen Controls window also displays the open trunk.
The front trunk locks whenever Model X is
locked using the touchscreen, externally using
the key or walk-away locking, or when Valet
mode is active (see Valet Mode).
Closing
The Model X body is made of lightweight
aluminum. Therefore, the hood is not heavy
enough to latch under its own weight and
applying pressure on the front edge or center of the hood can cause damage. To close the
hood:
Page 36 of 198
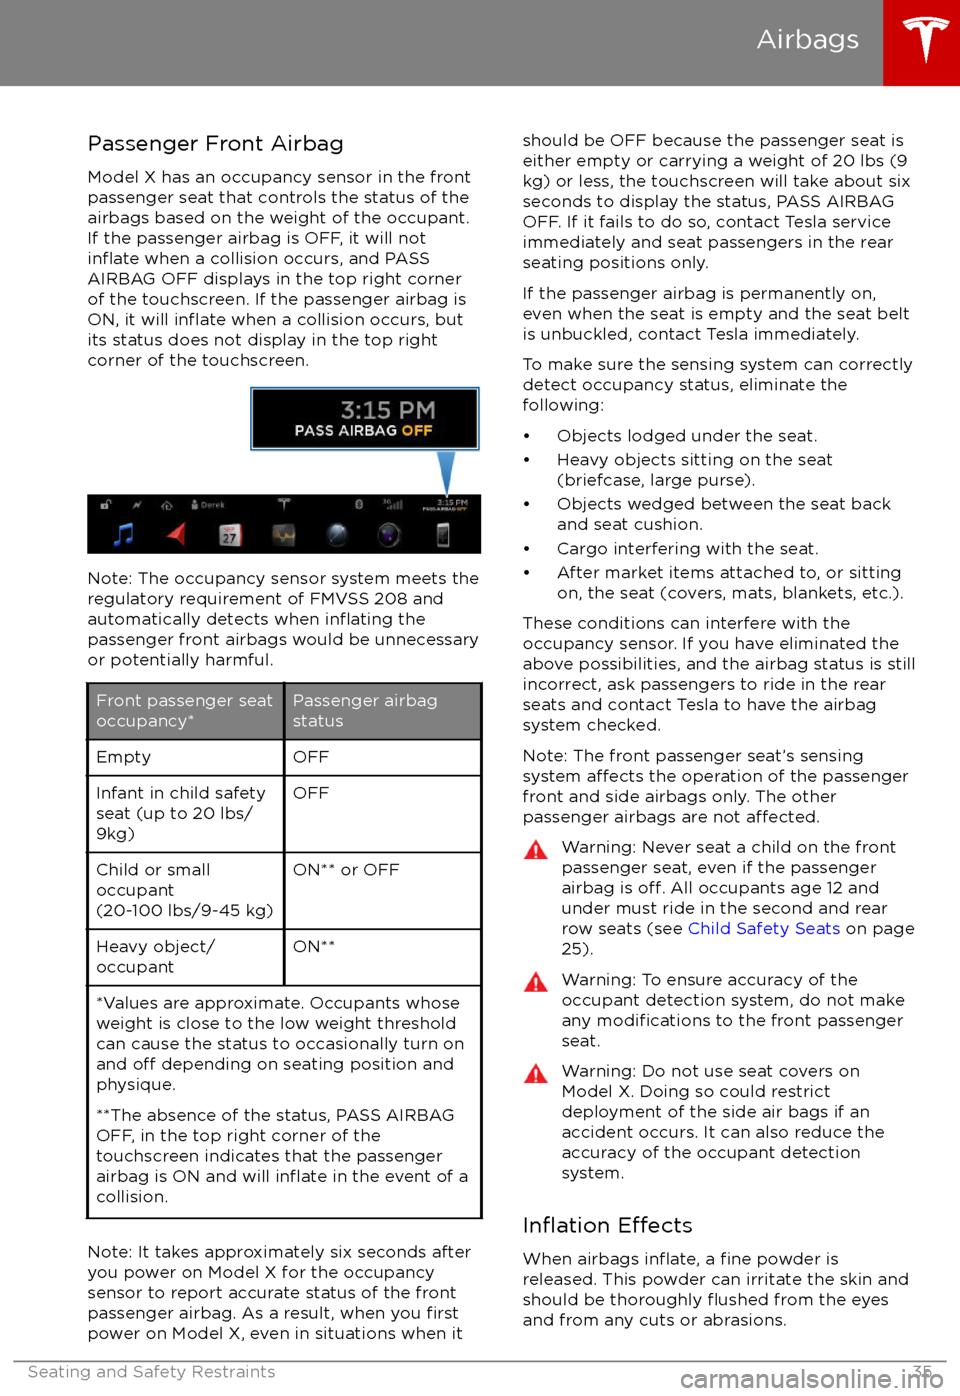
Passenger Front Airbag
Model X has an occupancy sensor in the front
passenger seat that controls the status of the
airbags based on the weight of the occupant. If the passenger airbag is OFF, it will not
inflate when a collision occurs, and PASS
AIRBAG OFF displays in the top right corner of the touchscreen. If the passenger airbag is
ON, it will
inflate when a collision occurs, but
its status does not display in the top right
corner of the touchscreen.
Note: The occupancy sensor system meets the regulatory requirement of FMVSS 208 and
automatically detects when
inflating the
passenger front airbags would be unnecessary
or potentially harmful.
Front passenger seat
occupancy*Passenger airbag
statusEmptyOFFInfant in child safety
seat (up to 20 lbs/
9kg)OFFChild or small
occupant
(20-100 lbs/9-45 kg)ON** or OFFHeavy object/
occupantON***Values are approximate. Occupants whose weight is close to the low weight threshold
can cause the status to occasionally turn on
and
off depending on seating position and
physique.
**The absence of the status, PASS AIRBAG
OFF, in the top right corner of the
touchscreen indicates that the passenger
airbag is ON and will
inflate in the event of a
collision.
Note: It takes approximately six seconds after
you power on Model X for the occupancy
sensor to report accurate status of the front
passenger airbag. As a result, when you
firstpower on Model X, even in situations when it
should be OFF because the passenger seat is
either empty or carrying a weight of 20 lbs (9
kg) or less, the touchscreen will take about six
seconds to display the status, PASS AIRBAG
OFF. If it fails to do so, contact Tesla service
immediately and seat passengers in the rear
seating positions only.
If the passenger airbag is permanently on,
even when the seat is empty and the seat belt is unbuckled, contact Tesla immediately.
To make sure the sensing system can correctly detect occupancy status, eliminate the
following:
Page 41 of 198
3. PreviousSame as described above for Next, except
it skips to the previous song or station. If
you have more than one favorite
defined,press and hold to cycle through favorites.
Note: Regardless of how you customize the
left side of the instrument panel, it
automatically changes to display navigation
instructions (if applicable), or to let you know
if a door or trunk is open when Model X is in a driving gear.
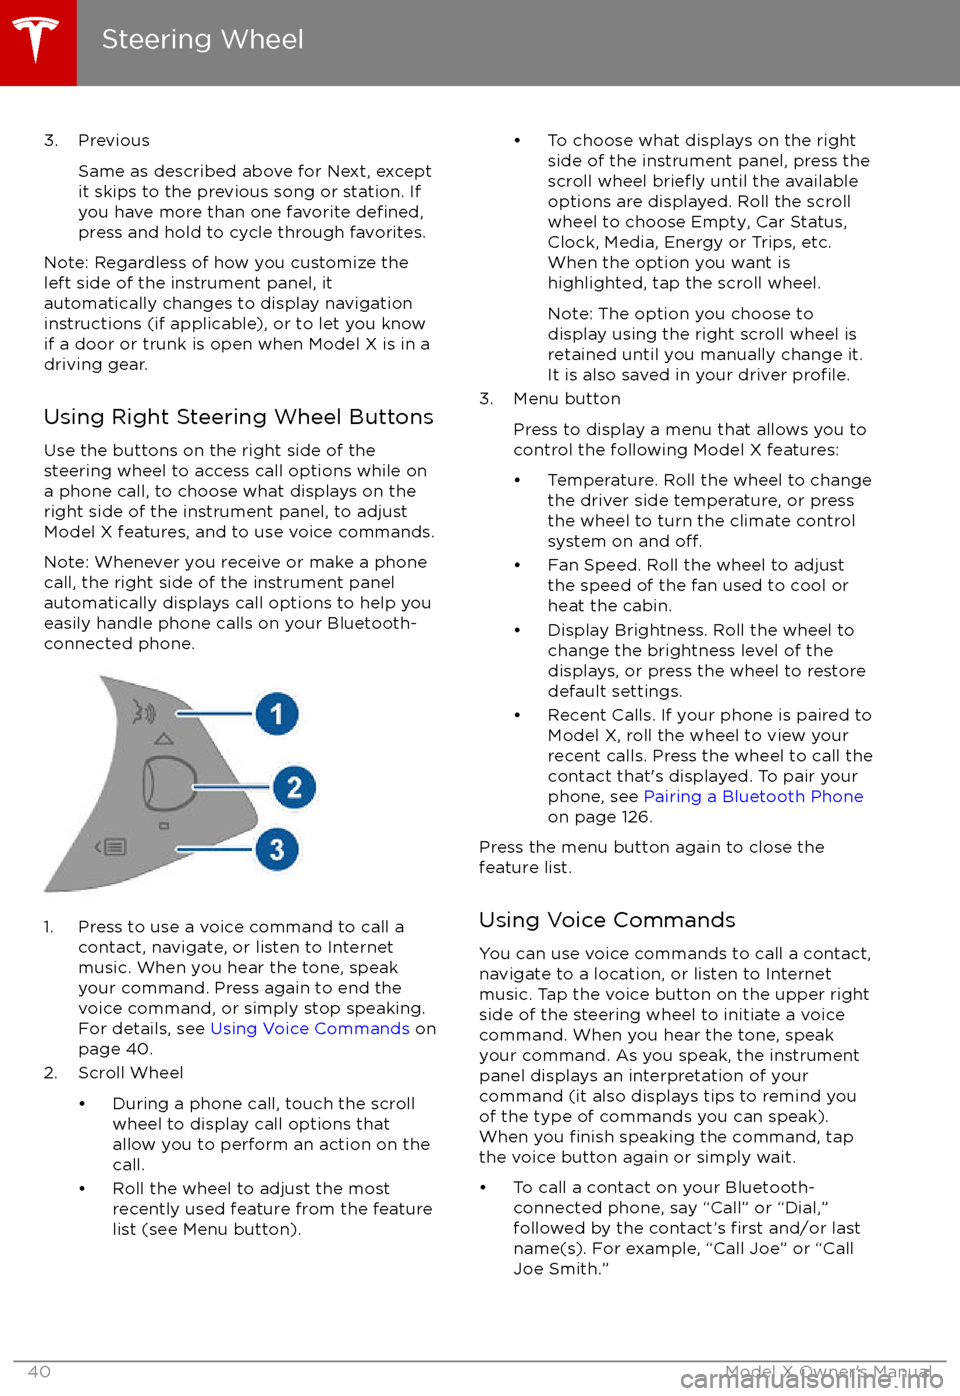
Using Right Steering Wheel Buttons Use the buttons on the right side of the
steering wheel to access call options while on
a phone call, to choose what displays on the
right side of the instrument panel, to adjust
Model X features, and to use voice commands.
Note: Whenever you receive or make a phone call, the right side of the instrument panelautomatically displays call options to help you
easily handle phone calls on your Bluetooth-
connected phone.
1. Press to use a voice command to call a
contact, navigate, or listen to Internetmusic. When you hear the tone, speak
your command. Press again to end the
voice command, or simply stop speaking.
For details, see Using Voice Commands on
page 40.
2. Scroll Wheel
Page 44 of 198
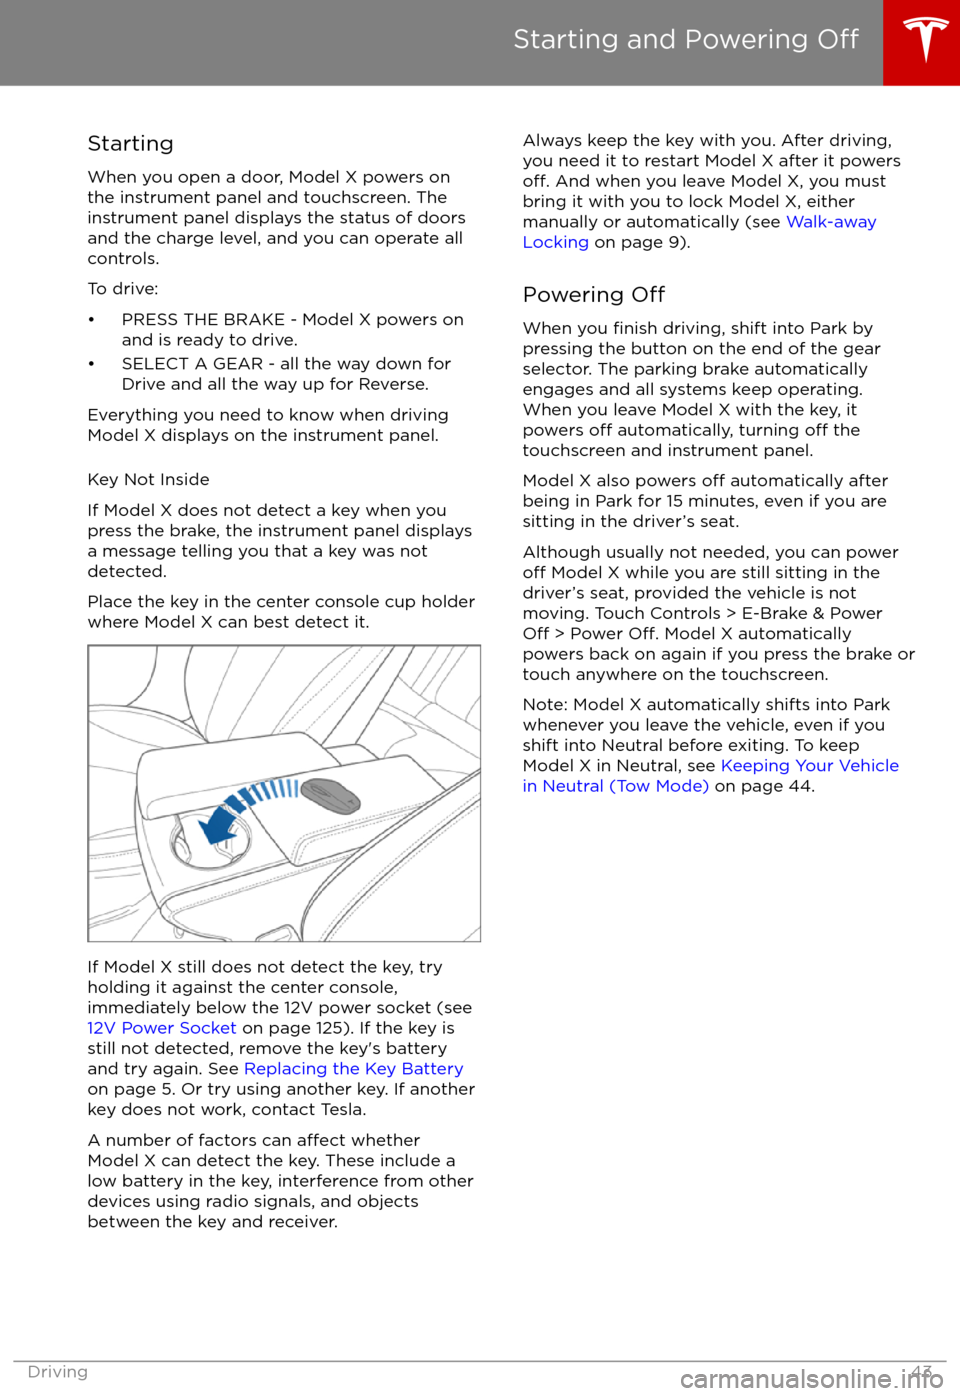
StartingWhen you open a door, Model X powers on
the instrument panel and touchscreen. The
instrument panel displays the status of doors
and the charge level, and you can operate all
controls.
To drive:
Page 50 of 198
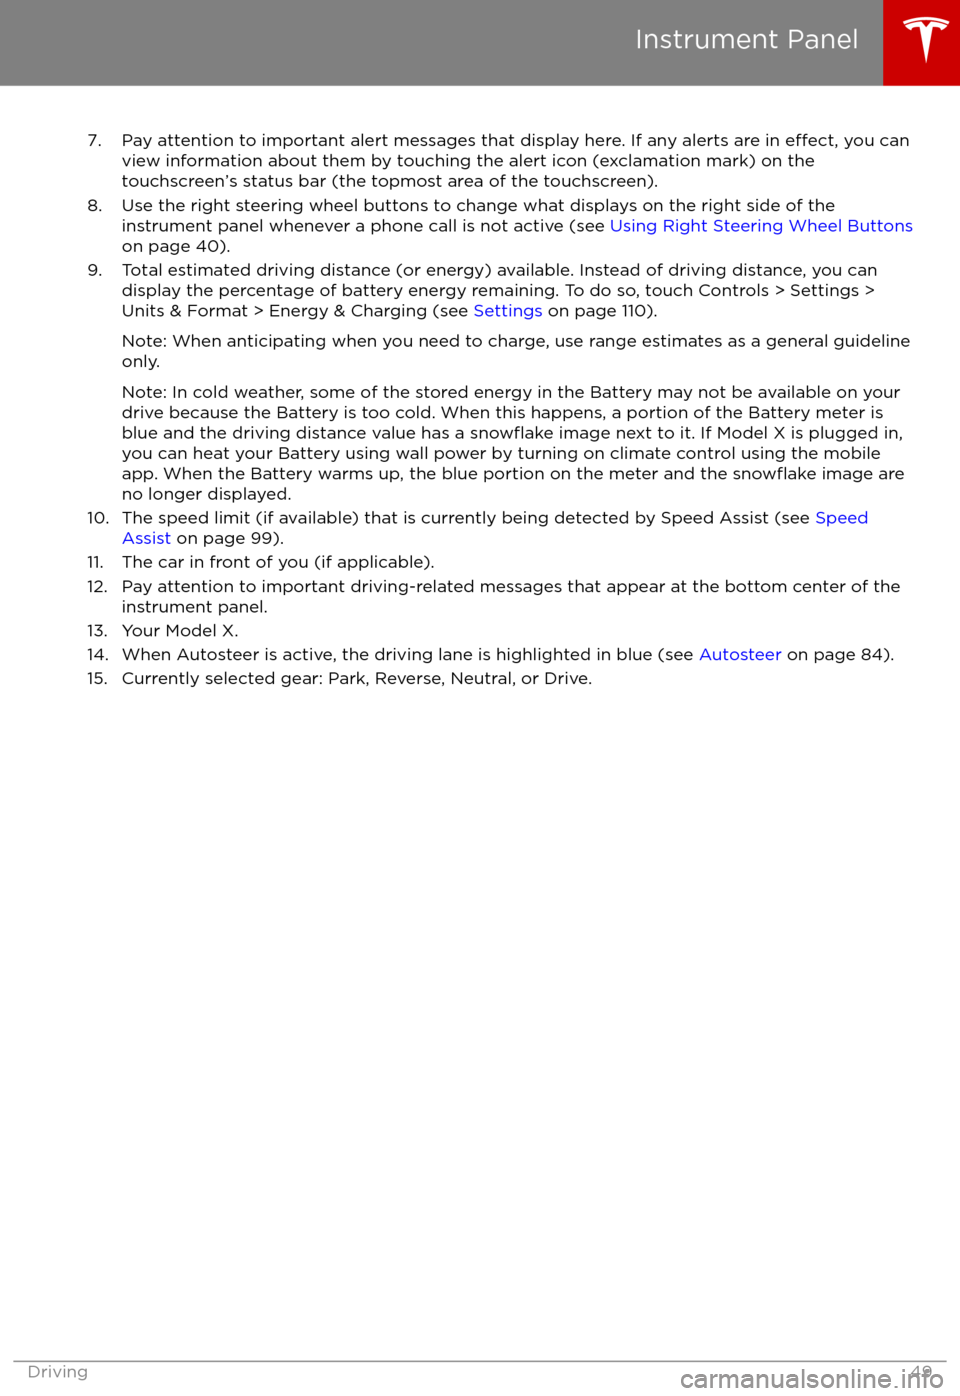
7. Pay attention to important alert messages that display here. If any alerts are in effect, you can
view information about them by touching the alert icon (exclamation mark) on the touchscreen
Page 52 of 198
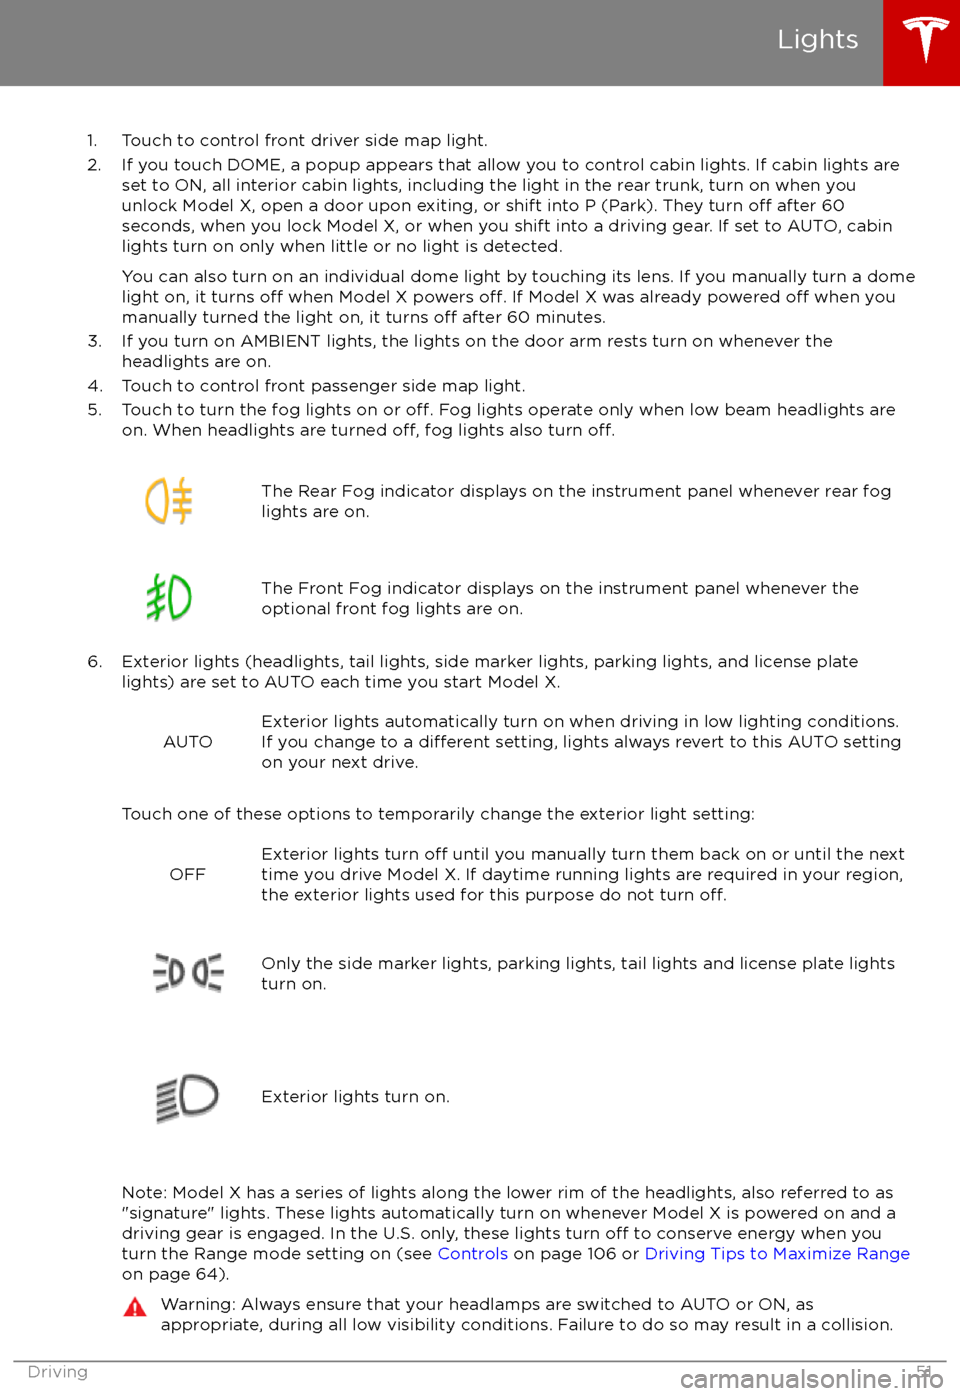
1. Touch to control front driver side map light.
2. If you touch DOME, a popup appears that allow you to control cabin lights. If cabin lights are set to ON, all interior cabin lights, including the light in the rear trunk, turn on when youunlock Model X, open a door upon exiting, or shift into P (Park). They turn
off after 60
seconds, when you lock Model X, or when you shift into a driving gear. If set to AUTO, cabin lights turn on only when little or no light is detected.
You can also turn on an individual dome light by touching its lens. If you manually turn a domelight on, it turns
off when Model X powers off. If Model X was already powered off when you
manually turned the light on, it turns off after 60 minutes.
3. If you turn on AMBIENT lights, the lights on the door arm rests turn on whenever the headlights are on.
4. Touch to control front passenger side map light.
5. Touch to turn the fog lights on or
off. Fog lights operate only when low beam headlights are
on. When headlights are turned off, fog lights also turn off.
The Rear Fog indicator displays on the instrument panel whenever rear fog
lights are on.The Front Fog indicator displays on the instrument panel whenever the
optional front fog lights are on.
6. Exterior lights (headlights, tail lights, side marker lights, parking lights, and license plate lights) are set to AUTO each time you start Model X.
AUTOExterior lights automatically turn on when driving in low lighting conditions.
If you change to a different setting, lights always revert to this AUTO setting
on your next drive.
Touch one of these options to temporarily change the exterior light setting:
OFFExterior lights turn off until you manually turn them back on or until the next
time you drive Model X. If daytime running lights are required in your region,
the exterior lights used for this purpose do not turn
off.Only the side marker lights, parking lights, tail lights and license plate lights
turn on.Exterior lights turn on.
Note: Model X has a series of lights along the lower rim of the headlights, also referred to as
"signature" lights. These lights automatically turn on whenever Model X is powered on and a driving gear is engaged. In the U.S. only, these lights turn
off to conserve energy when you
turn the Range mode setting on (see Controls on page 106 or Driving Tips to Maximize Range
on page 64).
Warning: Always ensure that your headlamps are switched to AUTO or ON, as
appropriate, during all low visibility conditions. Failure to do so may result in a collision.
Lights
Driving51
Page 57 of 198
Braking Systems
Model X has an anti-lock braking system
(ABS) that prevents the wheels from locking when you apply maximum brake pressure. This
improves steering control during heavy
braking in most road conditions.
During emergency braking conditions, the
ABS constantly monitors the speed of each
wheel and varies the brake pressure according to the grip available.
The alteration of brake pressure can be felt as
a pulsing sensation through the brake pedal.
This demonstrates that the ABS is operating
and is not a cause for concern. Keep
firm and
steady pressure on the brake pedal while
experiencing the pulsing.
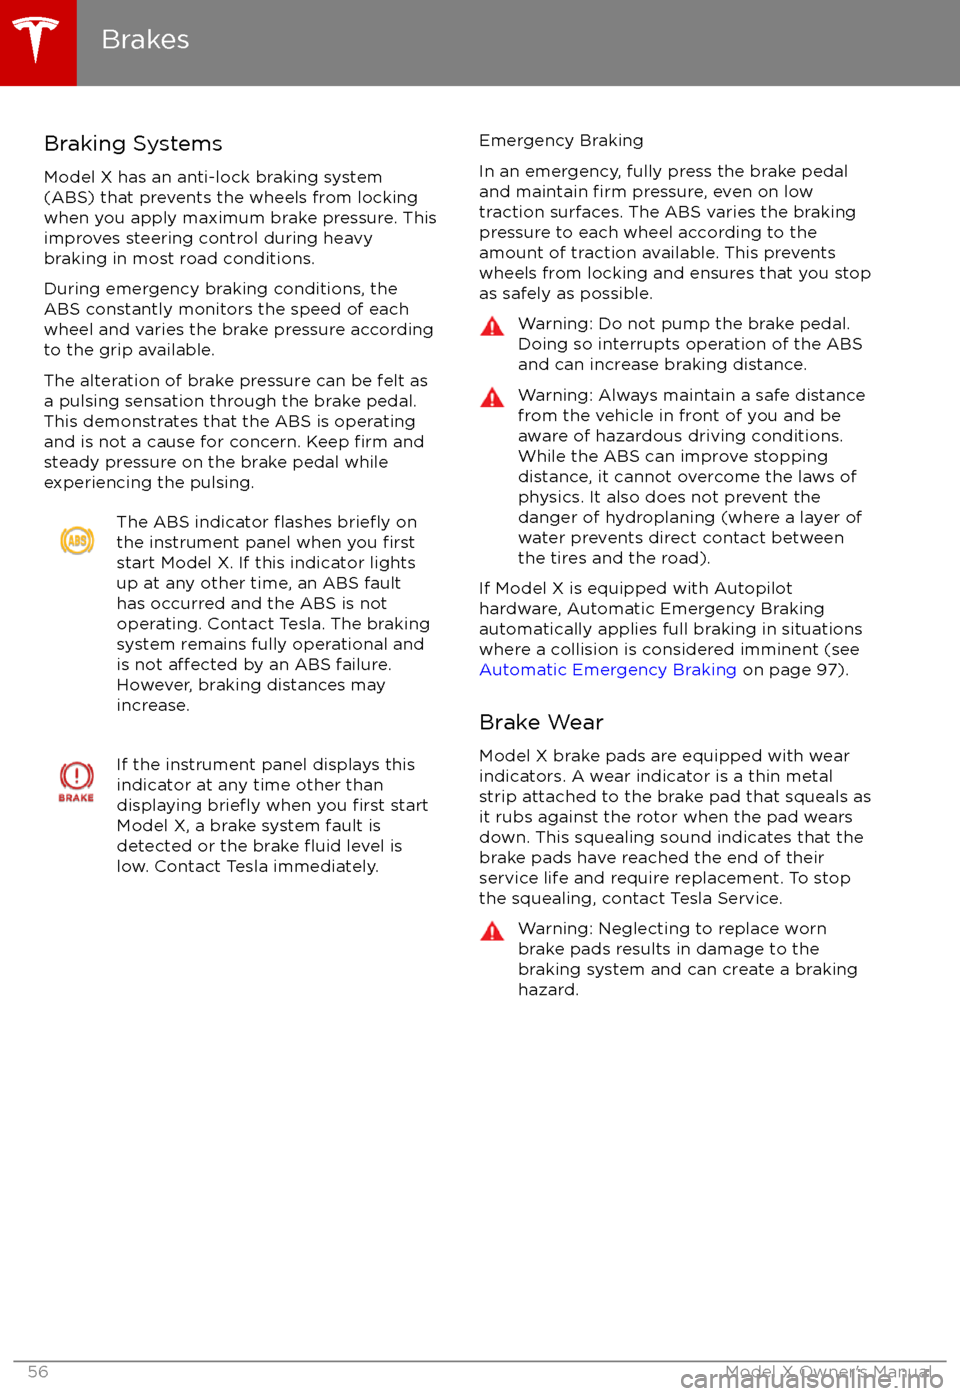
The ABS indicator flashes briefly on
the instrument panel when you firststart Model X. If this indicator lights
up at any other time, an ABS fault
has occurred and the ABS is not
operating. Contact Tesla. The braking system remains fully operational and
is not
affected by an ABS failure.
However, braking distances may increase.
If the instrument panel displays this
indicator at any time other than
displaying
briefly when you first start
Model X, a brake system fault is
detected or the brake
fluid level is
low. Contact Tesla immediately.
Emergency Braking
In an emergency, fully press the brake pedal
and maintain
firm pressure, even on low
traction surfaces. The ABS varies the braking
pressure to each wheel according to the
amount of traction available. This prevents
wheels from locking and ensures that you stop
as safely as possible.
Warning: Do not pump the brake pedal.
Doing so interrupts operation of the ABS
and can increase braking distance.Warning: Always maintain a safe distance
from the vehicle in front of you and be
aware of hazardous driving conditions.
While the ABS can improve stopping
distance, it cannot overcome the laws of physics. It also does not prevent the
danger of hydroplaning (where a layer of
water prevents direct contact between the tires and the road).
If Model X is equipped with Autopilot
hardware, Automatic Emergency Braking
automatically applies full braking in situations
where a collision is considered imminent (see
Automatic Emergency Braking on page 97).
Brake Wear
Model X brake pads are equipped with wear
indicators. A wear indicator is a thin metal
strip attached to the brake pad that squeals as
it rubs against the rotor when the pad wears
down. This squealing sound indicates that the
brake pads have reached the end of their service life and require replacement. To stop
the squealing, contact Tesla Service.
Warning: Neglecting to replace worn
brake pads results in damage to the
braking system and can create a braking
hazard.
Brakes
56Model X Owner
Page 58 of 198
Regenerative Braking
Whenever Model X is moving and your foot is
off the accelerator, regenerative braking slows
down Model X and feeds any surplus energy
back to the Battery.
By anticipating your stops and simply
removing pressure from the accelerator to slow down, you can take advantage ofregenerative braking to increase driving range.
Of course, this is no substitute for regular braking when needed for safety.
Note: If regenerative braking is aggressively
slowing Model X, such as on a steep descent,
brake lights turn on to alert other road usersthat you are slowing down.
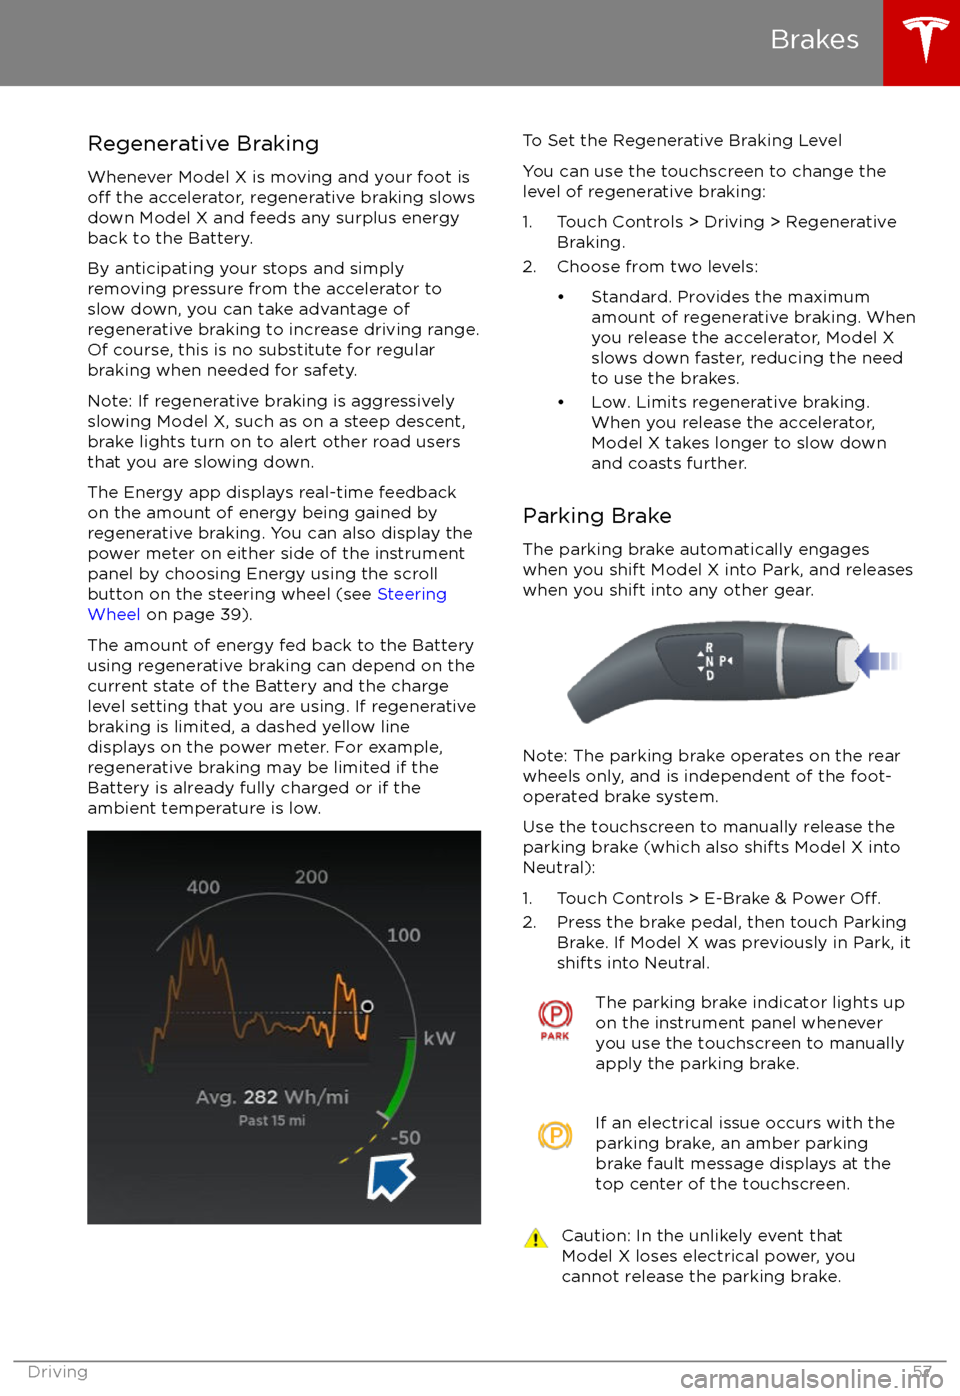
The Energy app displays real-time feedback on the amount of energy being gained by
regenerative braking. You can also display the
power meter on either side of the instrument panel by choosing Energy using the scroll
button on the steering wheel (see Steering
Wheel on page 39).
The amount of energy fed back to the Battery using regenerative braking can depend on the
current state of the Battery and the charge level setting that you are using. If regenerative
braking is limited, a dashed yellow line
displays on the power meter. For example,
regenerative braking may be limited if the Battery is already fully charged or if the
ambient temperature is low.
To Set the Regenerative Braking Level
You can use the touchscreen to change the
level of regenerative braking:
1. Touch Controls > Driving > Regenerative Braking.
2. Choose from two levels:
Page 60 of 198
How Park Assist Works
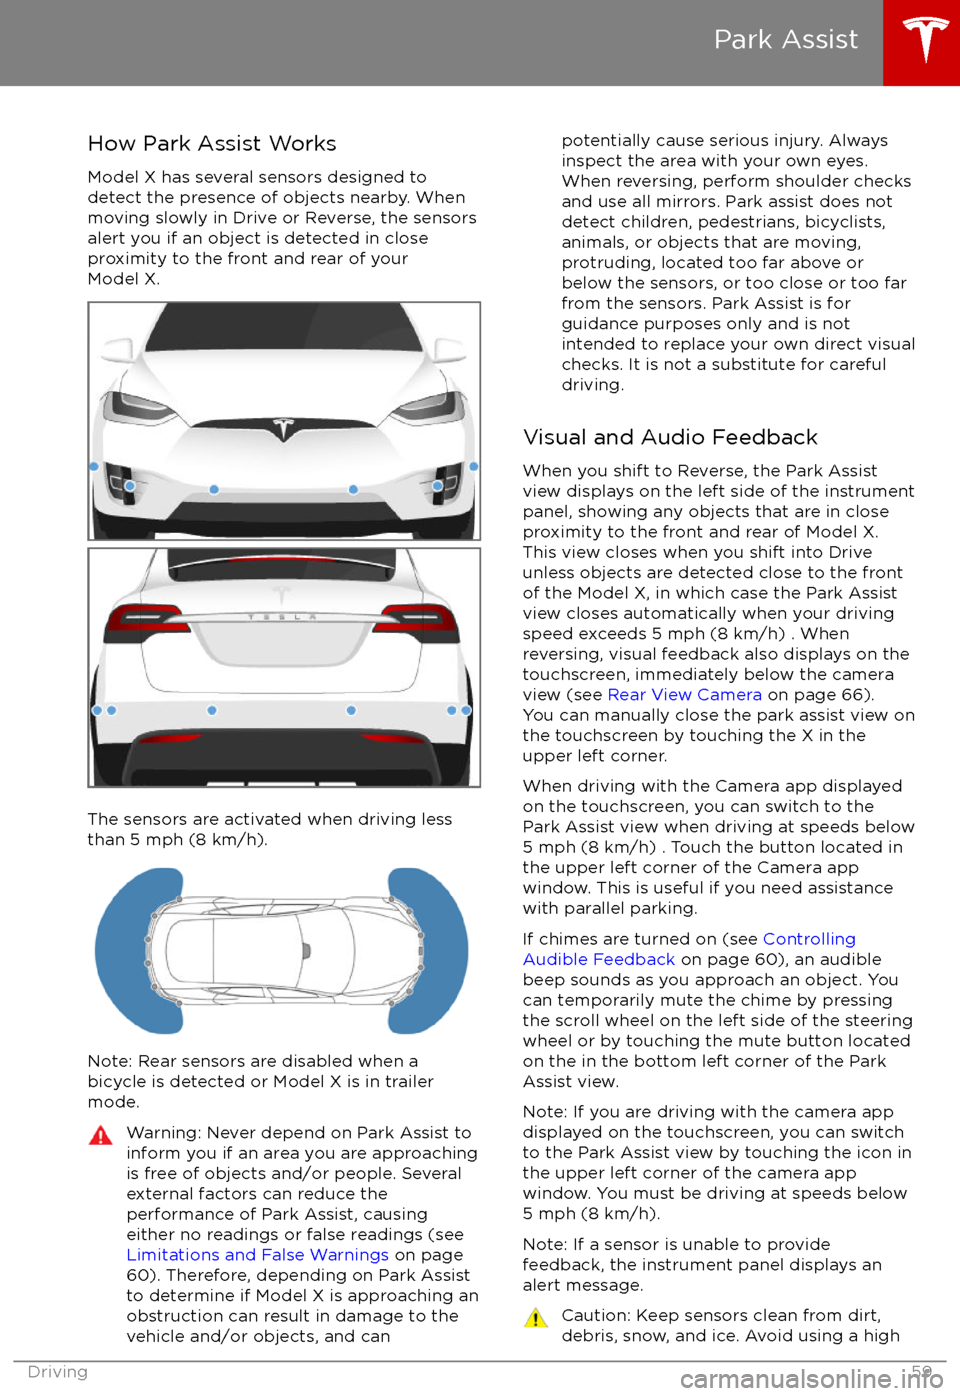
Model X has several sensors designed to
detect the presence of objects nearby. When
moving slowly in Drive or Reverse, the sensors
alert you if an object is detected in close
proximity to the front and rear of your
Model X.
The sensors are activated when driving less
than 5 mph (8 km/h).
Note: Rear sensors are disabled when a
bicycle is detected or Model X is in trailer
mode.
Warning: Never depend on Park Assist to
inform you if an area you are approaching is free of objects and/or people. Several
external factors can reduce the
performance of Park Assist, causing
either no readings or false readings (see
Limitations and False Warnings on page
60). Therefore, depending on Park Assist
to determine if Model X is approaching an
obstruction can result in damage to the
vehicle and/or objects, and canpotentially cause serious injury. Always
inspect the area with your own eyes.
When reversing, perform shoulder checks and use all mirrors. Park assist does not
detect children, pedestrians, bicyclists,
animals, or objects that are moving, protruding, located too far above or
below the sensors, or too close or too far
from the sensors. Park Assist is for
guidance purposes only and is not intended to replace your own direct visual
checks. It is not a substitute for careful
driving.
Visual and Audio Feedback
When you shift to Reverse, the Park Assist
view displays on the left side of the instrument
panel, showing any objects that are in close
proximity to the front and rear of Model X.
This view closes when you shift into Drive
unless objects are detected close to the front
of the Model X, in which case the Park Assist
view closes automatically when your driving
speed exceeds 5 mph (8 km/h) . When reversing, visual feedback also displays on the
touchscreen, immediately below the camera
view (see Rear View Camera on page 66).
You can manually close the park assist view on
the touchscreen by touching the X in the
upper left corner.
When driving with the Camera app displayed
on the touchscreen, you can switch to the
Park Assist view when driving at speeds below
5 mph (8 km/h) . Touch the button located in the upper left corner of the Camera appwindow. This is useful if you need assistance
with parallel parking.
If chimes are turned on (see Controlling
Audible Feedback on page 60), an audible
beep sounds as you approach an object. You
can temporarily mute the chime by pressing
the scroll wheel on the left side of the steering
wheel or by touching the mute button located
on the in the bottom left corner of the Park Assist view.
Note: If you are driving with the camera app
displayed on the touchscreen, you can switch to the Park Assist view by touching the icon inthe upper left corner of the camera app
window. You must be driving at speeds below
5 mph (8 km/h).
Note: If a sensor is unable to provide
feedback, the instrument panel displays an
alert message.
Caution: Keep sensors clean from dirt,
debris, snow, and ice. Avoid using a high
Park Assist
Driving59
Page 62 of 198
When Model X is stopped, Vehicle Holdcontinues to apply the brakes even after you
remove your foot from the brake pedal. When
driving on a hill or on a
flat surface, brake as
you normally would. You can release the brake
pedal, and remain stopped (even on a hill),
whenever the instrument panel displays the
Vehicle Hold indicator light.
This indicator displays on the
instrument panel whenever Vehicle
Hold is engaged.
To disengage Vehicle Hold, press the
accelerator pedal or press and release the
brake pedal.
Note: Shifting into Neutral also disengages Vehicle Hold.
Note: After actively braking Model X for
approximately 10 minutes, Model X shifts into
Park and Vehicle Hold cancels. Model X also
shifts into Park if it detects that the driver has
left the vehicle.
Vehicle Hold
Driving61